
I saw this video on you tube and I knew I wanted to make Yemeni Bread. That day I had planned to make some roast chicken and potatoes for dinner. The chicken had already been washed and trussed, and rubbed with herbs and spices, so this part of the plan could not be changed, but the potatoes were still sitting in a bag, in the cold room, so they were hurriedly tossed aside. That night we had roast chicken and Yemeni Bread. A strange combination perhaps but the excitement and expectation, overrode everything.

In Somali, this bread is called Sabayad, and is traditionally served with beef stew, dhal or beans. In Tunisia it’s called Mlawi but they use bread flour and semolina to make it. I opted to use salted butter to make the bread but you can also use vegetable oil, ghee or olive oil. It was a little on the oily side but very delicious and addictive. The next time I make it, I would still use butter, because it gives the best taste, in my opinion. If you ever decide to make the bread please watch the video first. I would like to thank Catherine from shebayemenifood.com for posting the video on you-tube.
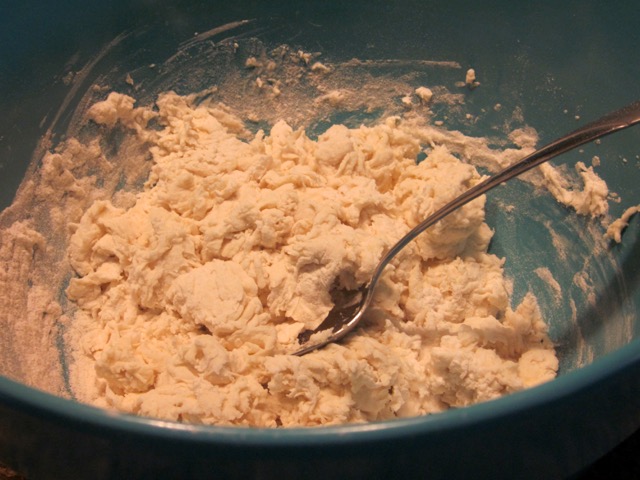
Mix the flour and salt in a large bowl. Make a well in the centre and add almost all the water and olive oil and mix to a soft almost sticky dough. (I had only 3 tablespoons of water left).

Turn on a floured surface and knead for 15 minutes until smooth and elastic (if sticky add a little flour at time). If you have an electric mixer with a dough hook it will take 10 minutes. This stage is very important because the dough has to be elastic.
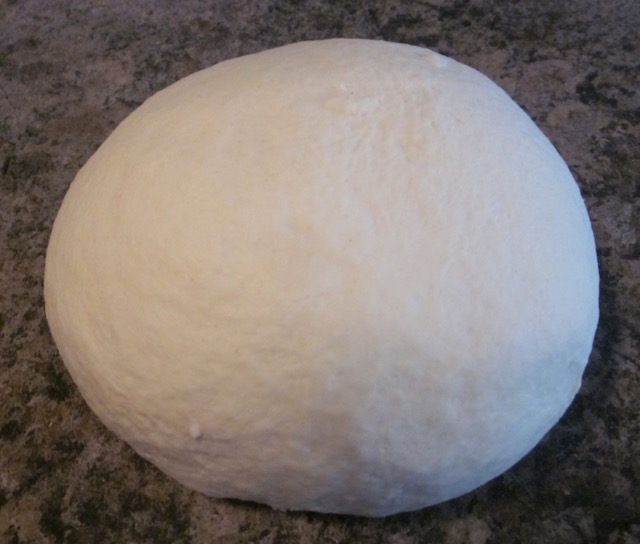
The dough should be smooth and elastic after kneading.
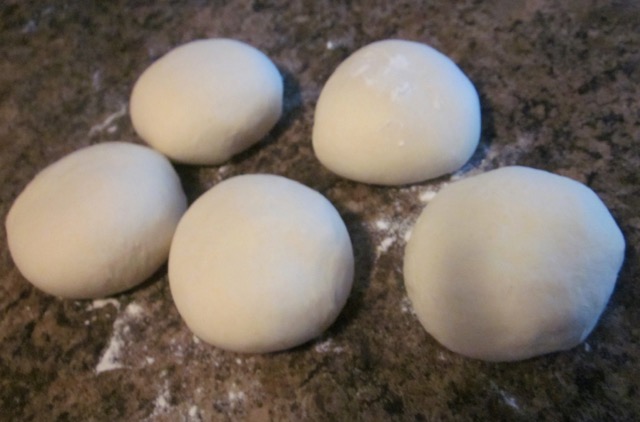
Divide the dough into five equal pieces. Form each piece into a smooth ball and cover with a kitchen towel and let rest for 20 minutes. (The dough weighed 1037g so I divided it into 5 pieces of about 200g each.)-this resting stage is very important.
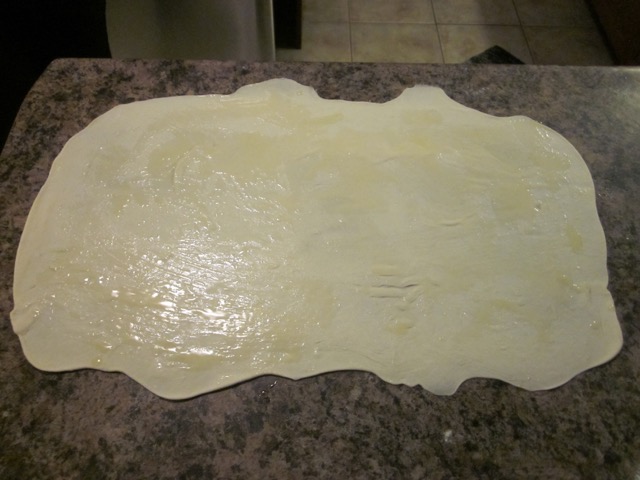
Take one rested dough, and roll out into a large thin transparent oblong (you can either use a rolling pin or stretch it out using your hands, whichever you find easy. (my oblong was about 18 x 12 inches). Sprinkle the melted butter all over the surface of the dough.(This was the first one I rolled out, quite crooked LOL. The others were better but I forgot to take pictures and all this was happening at night).

Then fold one third of one side, lengthwise, towards the middle. Sprinkle butter on the folded side.

Fold the remaining side towards the middle and sprinkle some butter on top.

Then fold the long strip into thirds. Cover and let rest for 15 minutes. (It’s important that the dough actually rests for 15 minutes).

Repeat the procedure with the rest of the dough.

Meanwhile preheat a cast iron griddle or a heavy based non-stick pan, to medium high heat (I just used my T-Fal non-stick pan and it worked just fine). Roll one of the rested doughs into an oblong (mine was 9 x 8 inches-the size will depend on the size of your pan). Brush one side with butter, place the buttered side on the pan and brush the top with butter, too.

Cook the bread on each side for about 3-5 minutes or until it turns golden brown. If it puffs up, don’t worry just press it with the spatula.

Mine really puffed out and it was exciting to see the bread turning out exactly as I’d seen it on you-tube.

There we go. My very first Yemeni bread ever. I was now the proud owner of a Yemeni bread…..
 The
The
proud owner of a second Yemeni Bread (LOL)

I served mine with the roasted chicken I had earlier planned to make before Yemeni bread interrupted my well-layed out schedule. Have a wonderful week my friend. Happy Yemeni Bread eating!!!!
Yemeni Bread
Preparation time: 40 minutes; Standing time: 45 minutes; Cooking time: 40 minutes; Makes: 5 Flatbreads
Ingredients
- 625g (5 cups, 22oz, 1.4Ib) all-purpose flour (original recipe called for Bread Flour, Canadian all purpose is high in gluten, so works fine)
- 1½ teaspoons salt
- 2 tablespoons olive oil
- 2 cups (480ml) water (I added almost all except 3 tablespoons)
- 125g (¼ stick) butter, melted, for brushing and cooking
Instructions
- Mix the flour and salt in a large bowl. Make a well in the centre and add about 1¾ cup water and olive oil and mix to a soft almost sticky dough (add more water only if needed-I had only 3 tablespoons of water left). Turn on a floured surface and knead for 15 minutes until smooth and elastic (if sticky add a little flour at time). (If using electric mixer knead for 10 minutes)
- Divide the dough into five equal pieces. Form each piece into a smooth ball and cover with a kitchen towel and let rest for 20 minutes. (The dough weighed 1037g so I divided it into 5 pieces of about 200g each.)
- Take one rested dough, and roll out into a large thin transparent oblong (you can either use a rolling pin or stretch it out using your hands, whichever you find easy. (my oblong was about 18 x 12 inches). Sprinkle the melted butter all over the surface of the dough.
- Then fold one third of one side, lengthwise, towards the middle. Sprinkle butter on the folded side. Fold the remaining side towards the middle and sprinkle some butter on top. Then fold the long strip into thirds. Cover and let rest for 15 minutes. Repeat the procedure with the rest of the doughs.
- Meanwhile preheat a cast iron griddle or a heavy based non-stick pan, to medium high heat (I just used my T-Fal non-stick pan and it worked just fine). Roll one of the rested doughs into an oblong (mine was 9 x 8 inches-the size will depend on the size of your pan). Brush one side with butter, place the buttered side on the pan and brush the top with butter, too.
- Cook the bread on each side for about 3-5 minutes or until it turns golden brown. If it puffs up, don’t worry just press it with the spatula.
- Repeat the procedure with the rest of the dough. Serve with???….I leave it to you to decide.
- For cup measures: spoon the flour into the cup, heaping it up over the top, then slide a knife across the top to level off the extra. Be careful not to shake or tap the cup to settle down the flour or you will have more than you need. I use a 240ml American cup.
- Last Updated: December 07, 2018
myfavouritepastime.com
Own notes: 900g flour + 3 cups less 4 tablespoons.


Thank you so much! The pictures helped a great deal. It is absolutely delicious 😋
Oh I am so glad you liked it too. It’s my absolute favourite bread and everyone in my family loves yemeni bread!!!
Liz
Nice! This bread looks great!
Thank you, Sabrina.
Liz
I love how this puffs out when cooking. Very JiffyPop like! Keep the bread recipes coming! – Kat
I had this last night for dinner. It was awesome!
I can’t wait to make this bread. I, too, had never heard of it. It looks simply delicious. I’m going to ‘pin’ it – but I’m also gonna print it out so I’ll remember to make this soon. How’s your autumn going so far?
I made it the first time I posted and yesterday I made 12 breads for dinner. Everybody loved them. I hope you find time to make them. Have a wonderful week!
Liz
Never heard of this bread! Look so forward to trying this! Great Blog! Light and Love, Shona
I never heard of it until the day I made it and ate it. Now it’s become a family favourite. Have a wonderful weekend!
Liz
Great post! It looks delicious and you make it look so easy! 🙂
I made 12 of these last night for dinner. Everybody loved them!
Liz
I bet! They look sooo good. We will be trying them sooner than later! 🙂
Ok good luck and thanks for popping by!
Liz
You did it again! Surprised me with this wonderful looking bread! I am going to try it! I wonder if it would be an interesting addition to Thanksgiving? Invited out but I’m brining veggies and buns! What do you think Liz, would this work with turkey? Can you believe summer is behind us already? The good news is, we are finally getting some rain. Hope your week is going well!
I had an early thanksgiving dinner because there are other dinners scheduled for Sunday and guess what I made with the turkey? Yemeni Bread of course. Everybody loved it. I ate one whole bread and now I can hardly lie comfortably in bed..LOL. The bread is addictive. It has certainly become one of our family’s favourites!!! I wish you a happy thanksgiving, Sandy. And thanks so much for your kindness.
Liz
Looks incredible. What a wonderful looking bread. I may have to bring out my jumbo cast iron skillet and try this sometime.
This bread is addictive. I can’t stop thinking about it. It tastes so damn good. I don’t know what to say!!! Thanks for popping by and enjoy the rest of the week!
iz
Well now I must definitely try it!
I wish you the best of luck. You’ll love it!!!
Liz this looks so easy to make. I wonder if I could make it with a good gluten free flour ? I’ll give it a go and let you know 😄
Yes it’s not difficult to make. I am not sure gluten free flour could give the same texture because the dough needs to be very elastic to enable paper thin rolling. Let me know what happens. Have a pleasant week!
Liz
This looks so moist. I wouldn’t mind using this as pizza crust and just put any topping I want and melt the cheese in the oven and viola! Mmm…:D
Hey Anna
Thank you. It tasted really nice. I’m planning to make some over the weekend.
Liz
Oh, I wish you live nearby. I would run over there and try some with you. 😀
Don’t we all wish we were neighbours. It would be totally awesome…can you imagine!!!!
liz
This is such a rich flat bread! Love unleavened bread..
Me too. Nice to see you after a long period of silence. Have a great week!
Liz
😊 you too have a lovely week Liz
Thank you!
Liz
looks brilliant – I haven’t had this type before I have made and posted about lehuh though a (predominantly jewish?) yemeni bread? https://polianthus.wordpress.com/2015/08/16/ethiopian-yemen-fusion-cooking-do-try-this-at-home/ – have you tried this too? It’s lovely
This was my first time and I must say it tasted really nice. It’s addictive!!! Let me look at the link right now. I love all kinds of breads!
Liz
Liz – it looked amazing – I am tempted to make it sometime soon, I love all kinds of breads as well, and I love discovering new breads!
Me too. Bread is the best part of cooking and baking!
Liz
It does look very good! You are willing to go to a lot of trouble for your bread habit!
Thank you. I love making bread so it’s not trouble at al but great fun. Enjoy the rest of the week!
liz
Looks delicious!
Thanks! Tastes delicious too!
liz
I’m sure! 🙂
Of course!
Oh those look so yummy! Butter is my favorite flavor! I can see my cast iron skillet pawing at the ground with excitement to make these breads!
Virtual hugs,
Judie
Hey Judie,
It was delicious and filling. What more can I say??? enjoy the rest of the week!
Virtual Hugs,
Liz